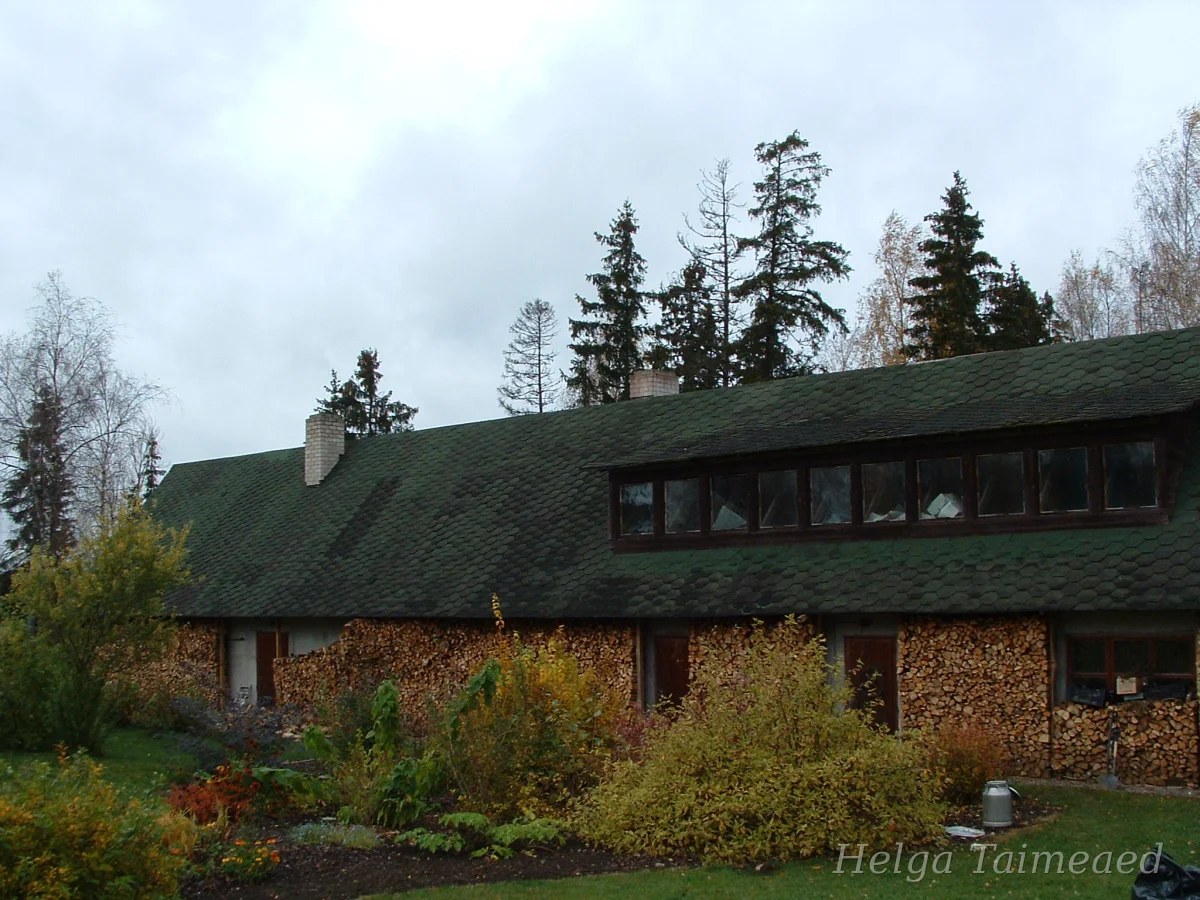
They say be careful with your wishes, because sometimes they can come true unexpectedly. I started building a long-standing dream, a green roof, on the outbuilding “thanks” to the storm Monika that hit Estonia on December 9, 2010, when as a result of the storm, the roof structure gave way under the weight of the accumulated snow and collapsed like a domino effect. The insurance company recognized the Soviet-era building codes as insufficient and therefore refused to compensate for the damage. Since the roof itself had no longer found a reasonable use after the end of animal husbandry, after thinking through my options and needs, I decided not to restore the 45-degree roof that the building had. So the area of a few hundred square meters needed a new solution. Since I had been interested in the topic of green roofs for years before the accident and had also implemented them on a small scale, now I had the opportunity to experiment on a larger scale, so to speak, in domestic conditions.

roof before collapse
Why are green roofs made?
Roof gardens can be seen in abundance in large cities in Western Europe as well as in North and South America. This is a very conscious choice to solve several ecological problems, where a planted green roof "catches" a large part of the rainwater that would otherwise have to be directed directly to the sewer. Green roofs also reduce heat loss from buildings in cooler weather and help to keep residential buildings cool in hot summer weather. Green roofs also bind a large amount of CO2. This is especially important in large cities, because there are fewer and fewer green park areas that would work as the "lungs of the city". When creating roof greenery, it is possible to proceed from either extensive or intensive use. In the case of intensive use projects, valuable new opportunities are created to bring greenery and green areas suitable for active recreation into cramped urban conditions. Extensively used green roofs cannot withstand constant trampling, although necessary maintenance work can be carried out there. However, with skillful solutions, it is also possible to create solutions where you can enjoy the vegetation quite close up.
The joys of founding
At that time, I received encouragement and the necessary advice for the construction from the newly published book “The Green Roof Manual: A Professional Guide to Design, Installation, and Maintenance Hardcover” by Linda McIntyre and Edmund C. Snodgrass, published in 2010. It collects experiences from projects carried out in various parts of Europe and America and outlines the pros and cons of different methods. I especially liked the advice there to do it at home with simple methods and a small budget.
The summer of 2010 was spent on dismantling the roof, preserving it, and finding reasonable solutions. In the summer of 2011, we started construction. First, skilled craftsmen performed strength calculations on the roof. Based on this, rafters with 80 cm spacings were installed, and support boards for attaching OSB ("Oriented Strand Board") boards were installed. This is a three-layer board made of wood-based, rectangular chips, where the binding agent is synthetic resin, which is sprayed over the chips before hot pressing. We covered the OSB with a strong geomembrane. This provides sufficiently strong protection for the base, acting as both a root barrier and waterproofing. When installing this material, it is worth trusting skilled men who have done this work before. During the rafter installation stage, we gave the roof a 1.5% slope to ensure drainage of precipitation. We used 100x100 beams to fix the geomembrane on the higher side of the slope, which in turn was covered with rolled sheet metal. The lower edge was covered with a plastic board made by Plastrex, which was installed 1.5 cm above the roof to allow drainage, and to prevent clogging, the roof edge was covered with another 20 cm of large pebbles, through which water can easily flow through. Since the building under this roof is not heated and the roof is used extensively, more protective layers in the form of geotextiles and other materials could not be added to the roof. I also did not add a water-storing mat and a special draining cover, which must definitely be used, for example, in the case of intensively used roof landscaping on the roofs of large heated high-rise buildings.
The next task was to mix a suitable growing medium. Since there is no field soil free of weed seeds, I decided to make a mixture of unneutralized peat moss, limestone screens with a 0-4mm fraction, and light gravel. I started from the principle that peat binds moisture well and limestone screens neutralize the peat to a suitable pH value for the planned plants. Light gravel works well as drainage, is very light, and helps maintain the airiness of the growing surface, and it also binds some of the water during abundant rainfall, which the plants use again during drought. Sand and other suitable rock fillers can also be used as part of the substrate. The idea is that locally available and economical material should be used. Brick chips, crushed gravel, etc. also work well as drainage. However, light gravel is the best as a single component precisely because of its weight. I only used sand in the relaxation corner as a base for limestone slabs, I did not want to use additional weight in the form of sand elsewhere. The components of the growing soil were spread on the roof in layers and then mixed on site. Due to the drought, the growing soil had to be watered thoroughly before planting began. The layer thickness was compacted to 5-7 cm.
Roof planting
There are several options for planting a roof – sowing seeds, cuttings, potted plants or pre-grown mats. I used a combination of the first three options. Each of them has its own advantages and disadvantages. When sowing from seeds, you have to take into account the rather long germination time and you have to wait a long time for the desired result. However, there are species that grow better from seed – for example, sand thyme (Thymus), heather ( Diantus arenarius ) and field carnation (Diantus deltoides) . A significantly faster and at the same time favorable result is achieved by covering the surface with easily rooted cuttings. The cut cuttings can be sown directly on loose soil and then rolled up. The easiest to root are various sedums (Sedum). In my selection, I used six-sided (S. sexlanguare), Kamchatka ( Sedum kamtschaticum) , Ewers (S. ewersii) , creeping (S. spurium), white (S. Album) and rock sedum (S. Album) . In addition, I also used mountain onions ( Sempervivum) various forms, dwarf iris (Iris pumila) and panicle saxifrage (Saxifraga paniculata).
Rooted potted plants will definitely give you the desired result the fastest. However, the disadvantages are the high price and the weeds that come with the growing medium. Also, potted plants planted on the roof should not be pampered with fertilizers and other excessive care - otherwise they will not be able to survive in the nutrient-poor growing medium. My selection included Hokkaido stonecrop 'Bertram Anderson' (Sedum cauticola) , chives (Allium schoenoprasum), alpine aster (Aster alpinum), common cat's paw 'Rubra' (Antennaria dioica ), Faroese wrinkled leaf (Alchemilla faeroensis var pumila), hairy juniper (Cerastium tomentosum), cushion phlox (Phlox subulata), narrow-leaved bluebell (Sisyrinchium angustifolium) and Dalmatian geranium (Geranium dalmaticum). I wanted to see them there as individual spots among other vegetation.
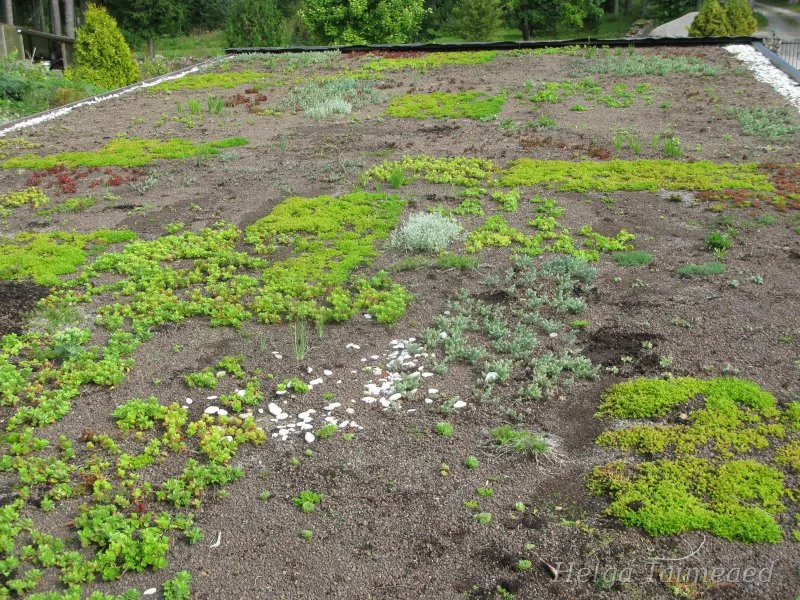
What is especially nice about roof landscaping is that it looks a little different every year and season. Years are not the same - some plants can tolerate a mild and wet winter, while others prefer drier weather conditions. Some of the plants originally brought to the roof did not withstand these growing conditions (mountain onions), some were "shade-dead" for a year and reappeared the following year (cushion phlox). It is precisely because of the unstable weather conditions that it is worth making the vegetation rich in species. It is also not worth making very clear-cut patterns with plants in large patches, because otherwise the empty spot will have to be replanted. With mixed planting, this risk is significantly lower. Also, depending on the slope of the roof and the lighting conditions, you can experiment and use a much longer list of suitable plants. Although it may take 3-5 years to achieve the final result when built in this way, such a roof will be much more individual and many times cheaper to build compared to using ready-made plant mats.
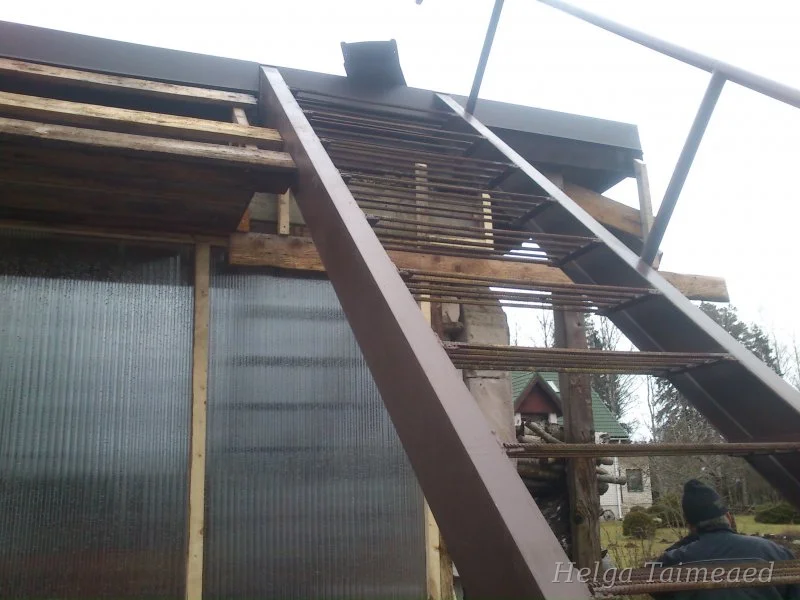
A sturdy "staircase to the sky" made of recycled metal is used to access the roof.
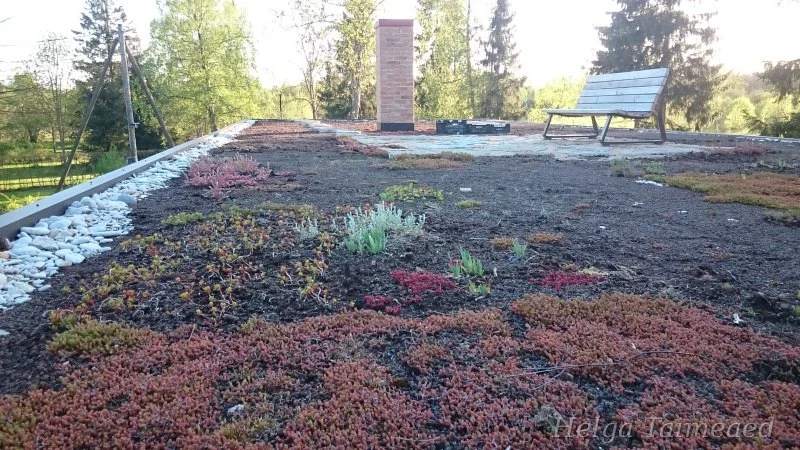
To comfortably enjoy the views, we also placed a garden bench on limestone slabs laid on a sand cushion. This created a sky garden relaxation corner – a nice place to enjoy the views from above and drink coffee.
Dreams change the world!
References
Edmund C. Snodgrass and Linda McIntyre “THE GREEN ROOF MANUAL” Published in 2010 Timber Press, Inc
Periodicals
Äripäev “The grass roof works as a natural air conditioner in a room under the roof”
04.09.2008
Internet
http://www.greenroof.ee
http://www.optigreen.co.uk/SystemSolutions/SystemSolutions.html